

Data layer is a java script object that is used to pass information from your website to your google tag manager container. Data layer contains various data points and google tag manager uses them to collect data. at present data layer in WordPress in getting its popularity in tracking sector.
In the world of e-commerce, understanding user behavior and tracking key metrics are crucial for making data-driven decisions that enhance performance and drive sales. One powerful tool that can help you achieve this is the data layer. Implementing a data layer in WordPress can streamline your data collection process, providing deeper insights into your e-commerce activities. Here’s a comprehensive guide on how to set up and utilize a data layer in WordPress for tracking e-commerce data.
What is a Data Layer?
A data layer is a structured, JavaScript-based object that holds data about user interactions on a website. It acts as a bridge between your website and analytics or marketing tools, ensuring that data is captured accurately and consistently. For e-commerce sites, a data layer can track product views, add-to-cart actions, purchases, and more.
Data Layer in WordPress: An Overview
WordPress Architecture Basics
WordPress, one of the most popular content management systems, operates on a framework of themes, plugins, and a robust database. It’s designed to be flexible and user-friendly, but this flexibility also allows for the integration of advanced features like a data layer.
How Data Layer is Integrated
In WordPress, the data layer can be integrated in a few different ways. Typically, it involves placing JavaScript code in the site’s header or footer, which then interacts with the site’s existing data and structure. This setup allows for seamless communication between the WordPress environment and external analytics tools.
Why Use a Data Layer in WordPress?
- Enhanced Tracking: Provides a standardized way to capture and manage data across various analytics and marketing platforms.
- Improved Accuracy: Reduces the risk of data discrepancies and ensures that data collection is consistent.
- Flexibility: Allows for easy integration with various tools and platforms without altering your website’s core functionality.
If you have an ecommerce website and you need to track the data of your most viewed items, add to cart data, purchase data then you need to add a data layer to your website. If you have a wordpress website then you can do it with a plugin.
Step 1 : How to implement data layer in your WordPress website
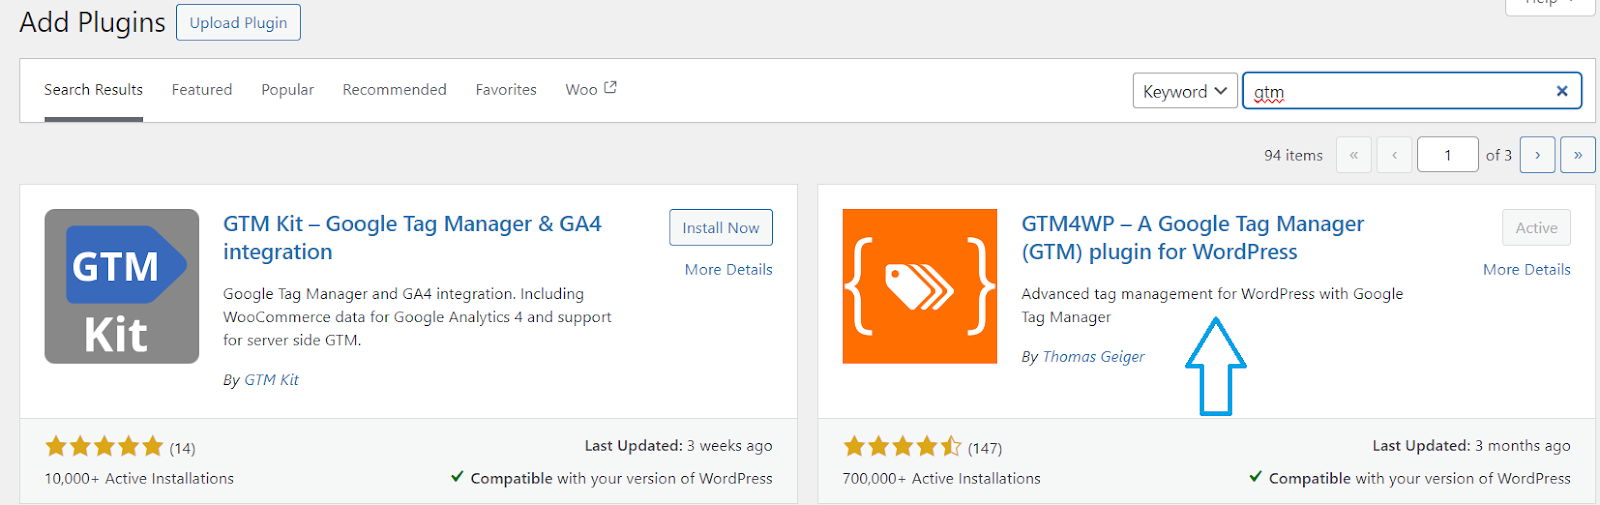
1a. Log in to your wordpress website and add a plugin. Write GTM4WP by thomas geiger, install it and activate it
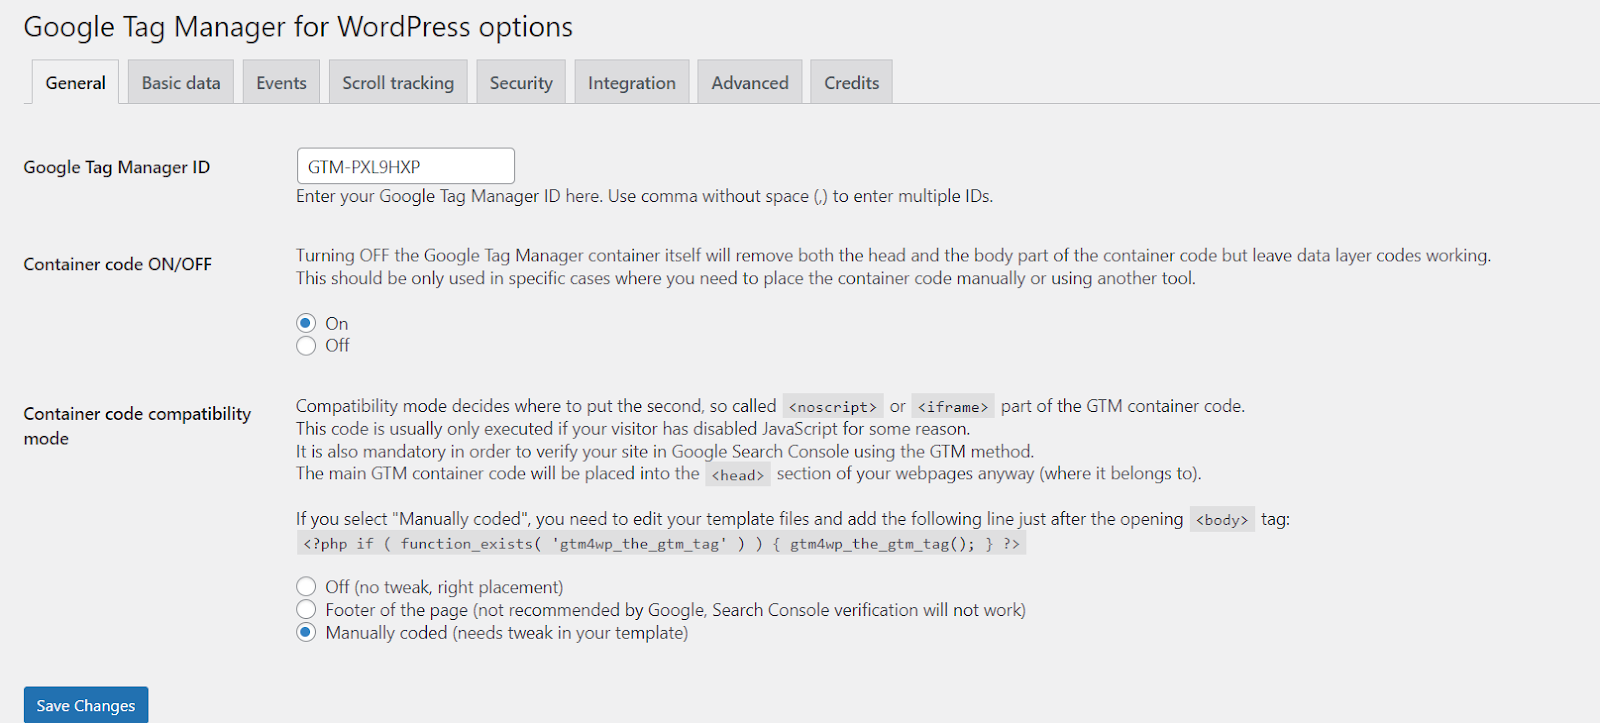
1b. Go to settings then put your google tag manager id in the box, then put on the container button, next you need to manually put the javascript code in the body of your website. You will find this in the theme
file editor.
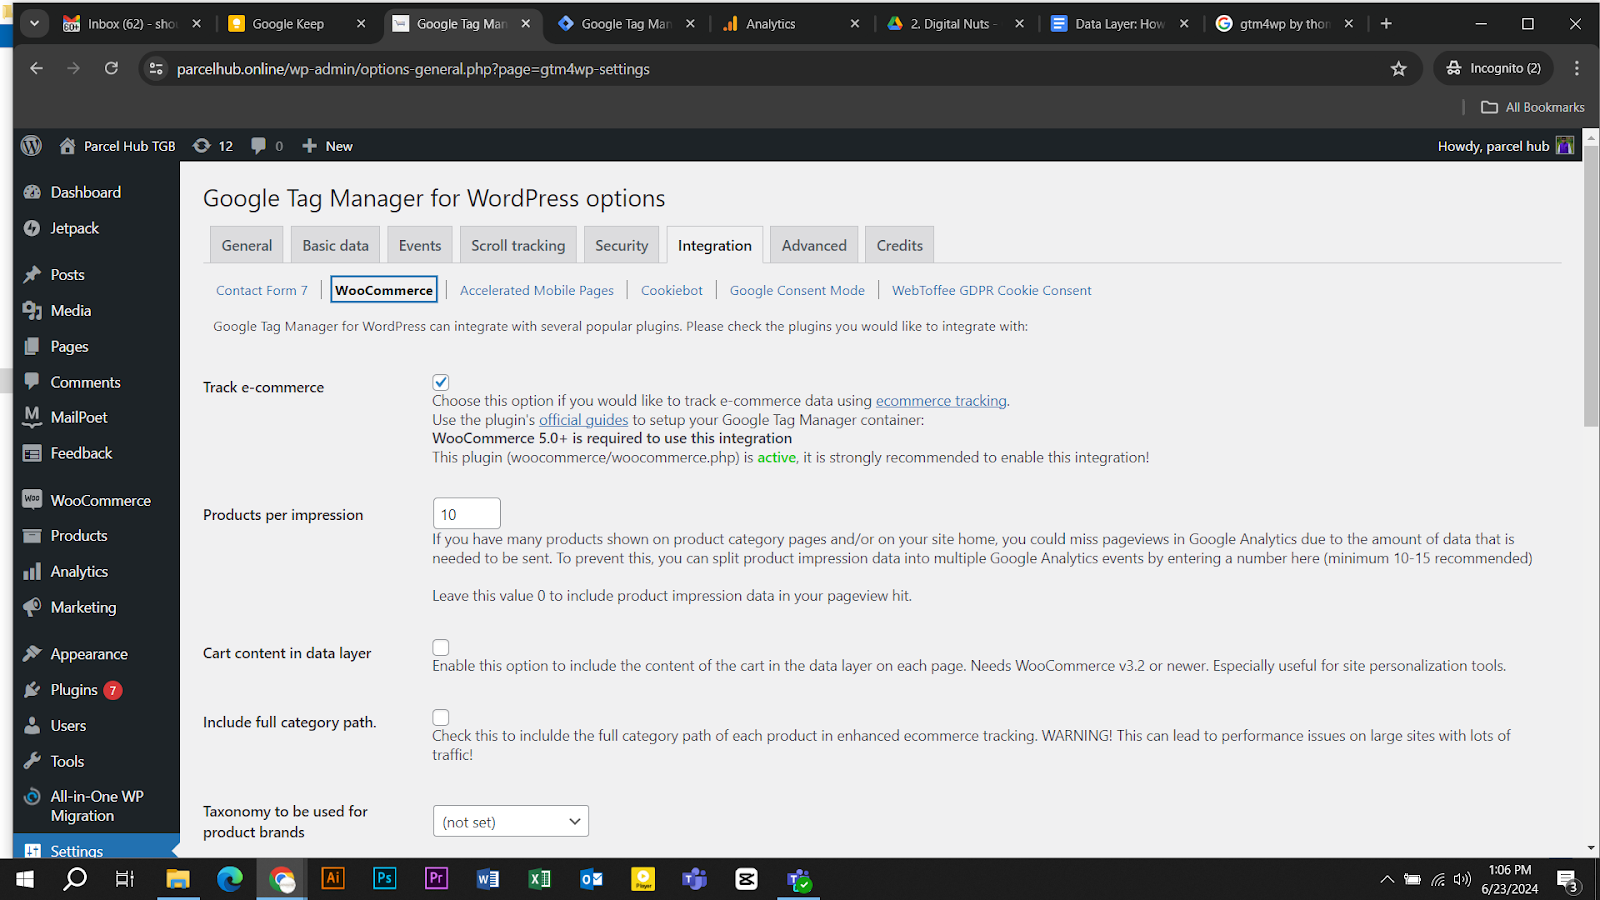
1c. Go to the integration section then click woocommerce and turn on track e commerce and click save.
Step 2: Set up a Tag in Google Tag Manager
Now you need to set up a tag along with a trigger to demonstrate your e-commerce data in google analytics 4.
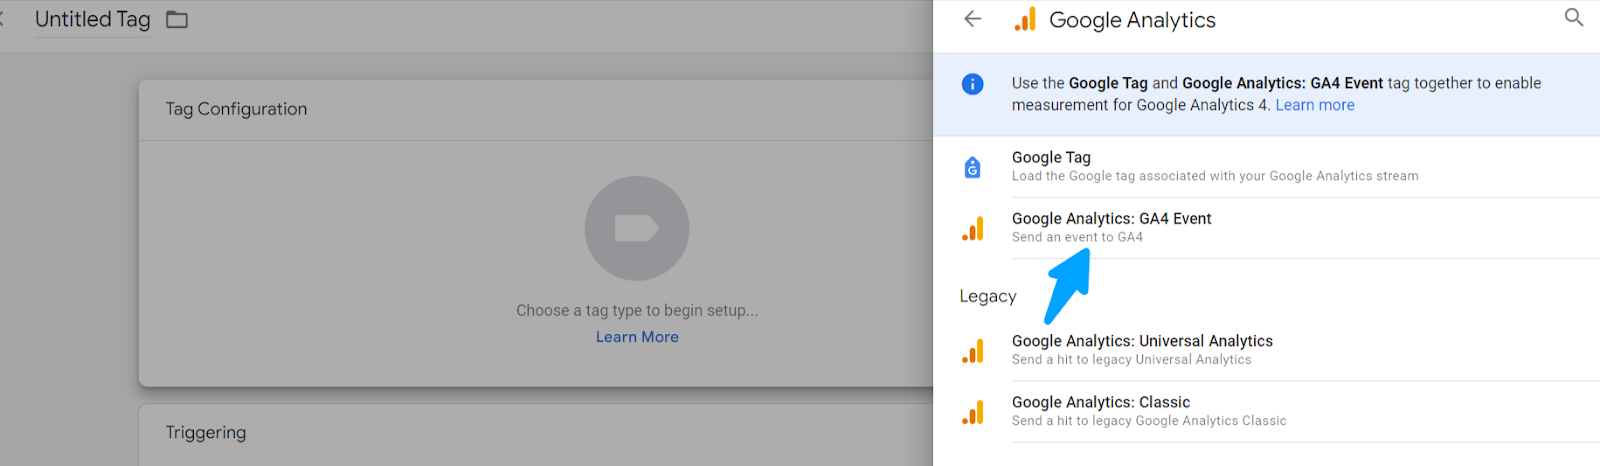
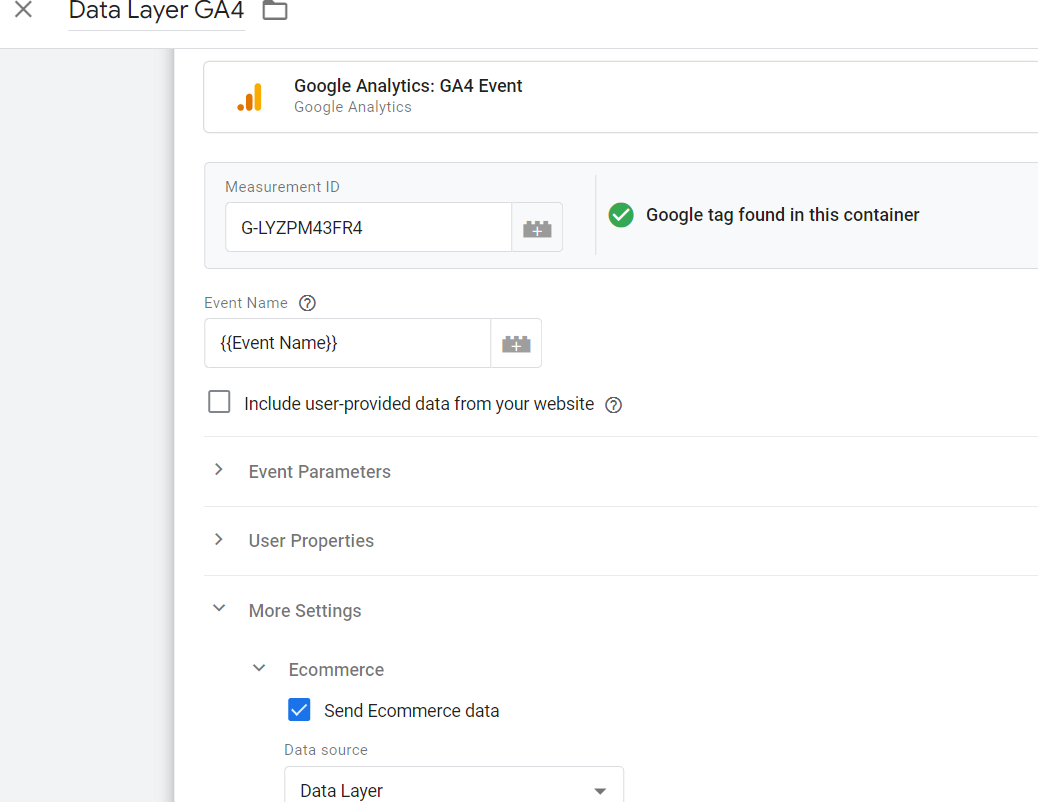
2a. Go to your google tag manager workspace and add a tag for ga4 event
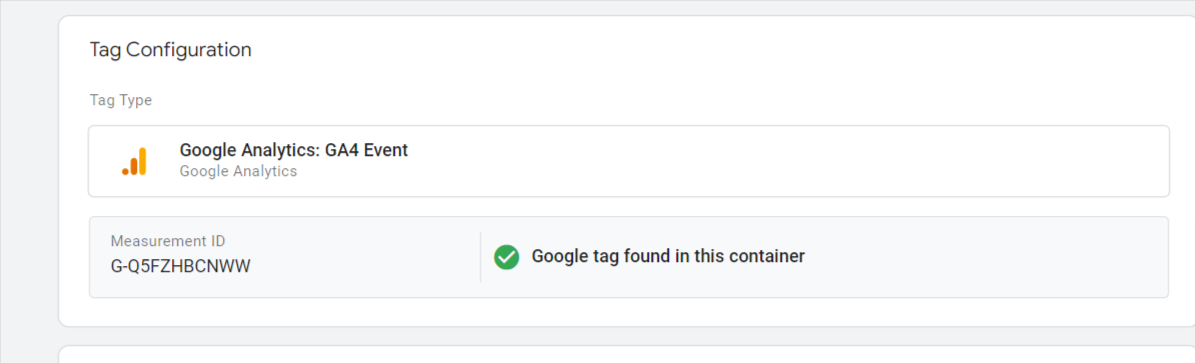
2b. Put your ga4 measurement id, you will find it in data streams of ga4
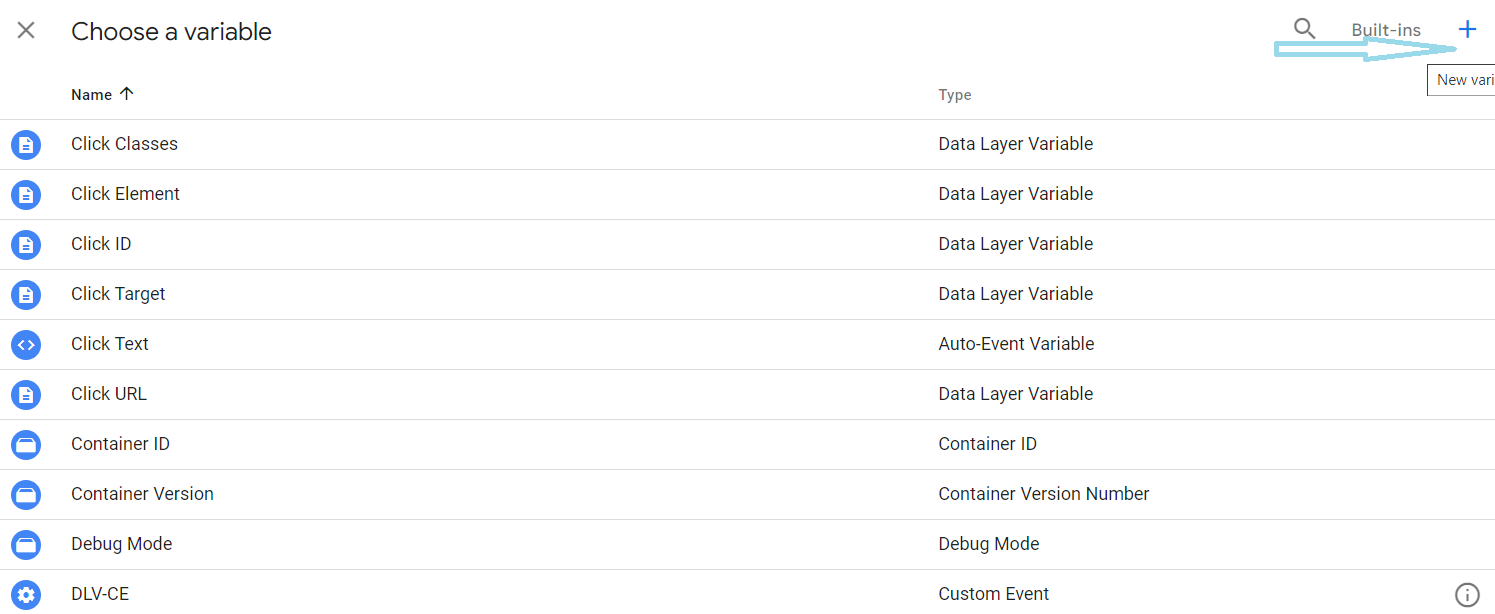
2c. Now we need to add a variable ( custom event ) in event name section
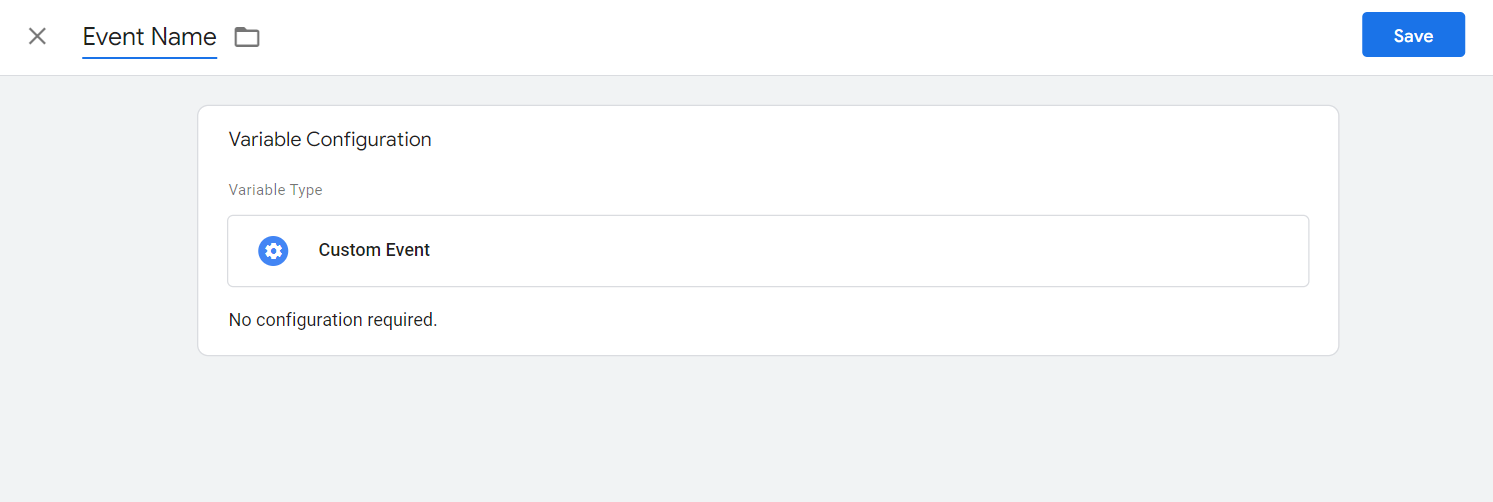
2d. We will add a custom event as a variable and name it as Event names. Here no configuration is needed as google tag manager will automatically track the data points.
2e. Now we have to turn on the Send e commerce data in tag settings
Step 3: Set up a Trigger in Google Tag Manager
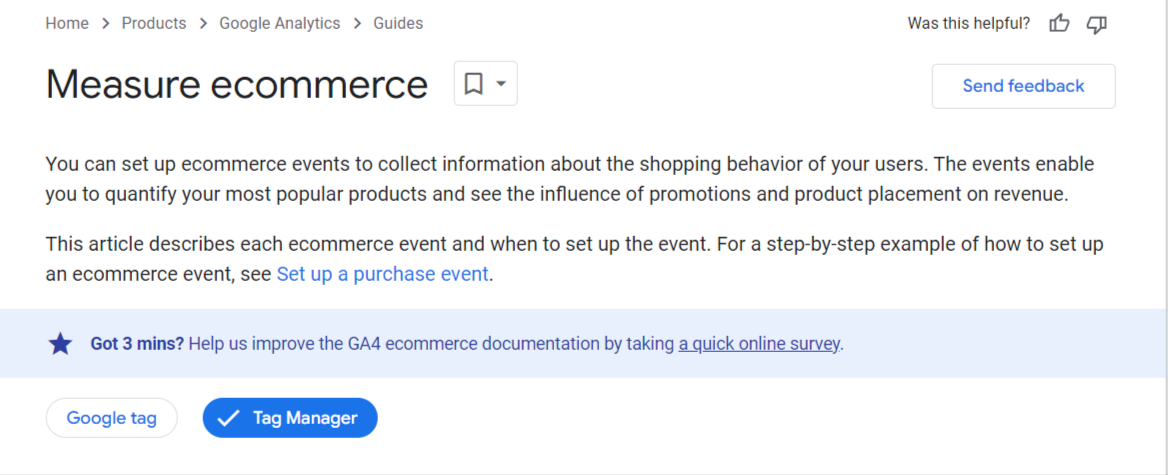
3a. First you need to know about ecommerce measurement. Click here
3b. Then you need to find the event names from tag manager sections to understand which events you can track for your e commerce.
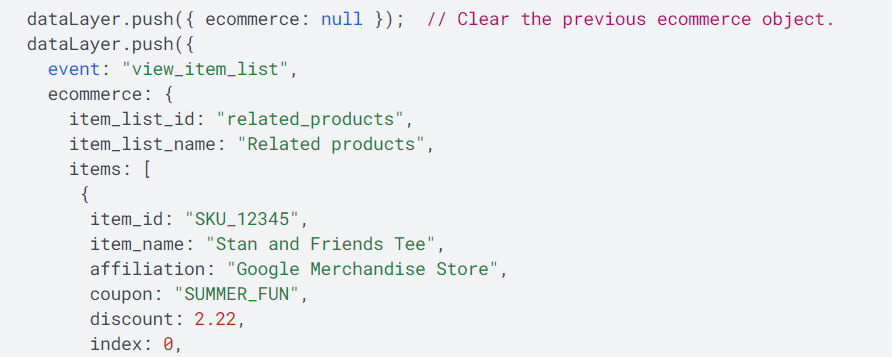
3c. Now you have to create a doc for all the events you want to track for configuring your triggers for e- commerce data. Separate each names with | sign
View_item_list | select_item | view_item | add_to_cart | add_to_wishlist | view_cart | remove_from_cart | begin_checkout | add_shipping_info | add_payment_info | purchase
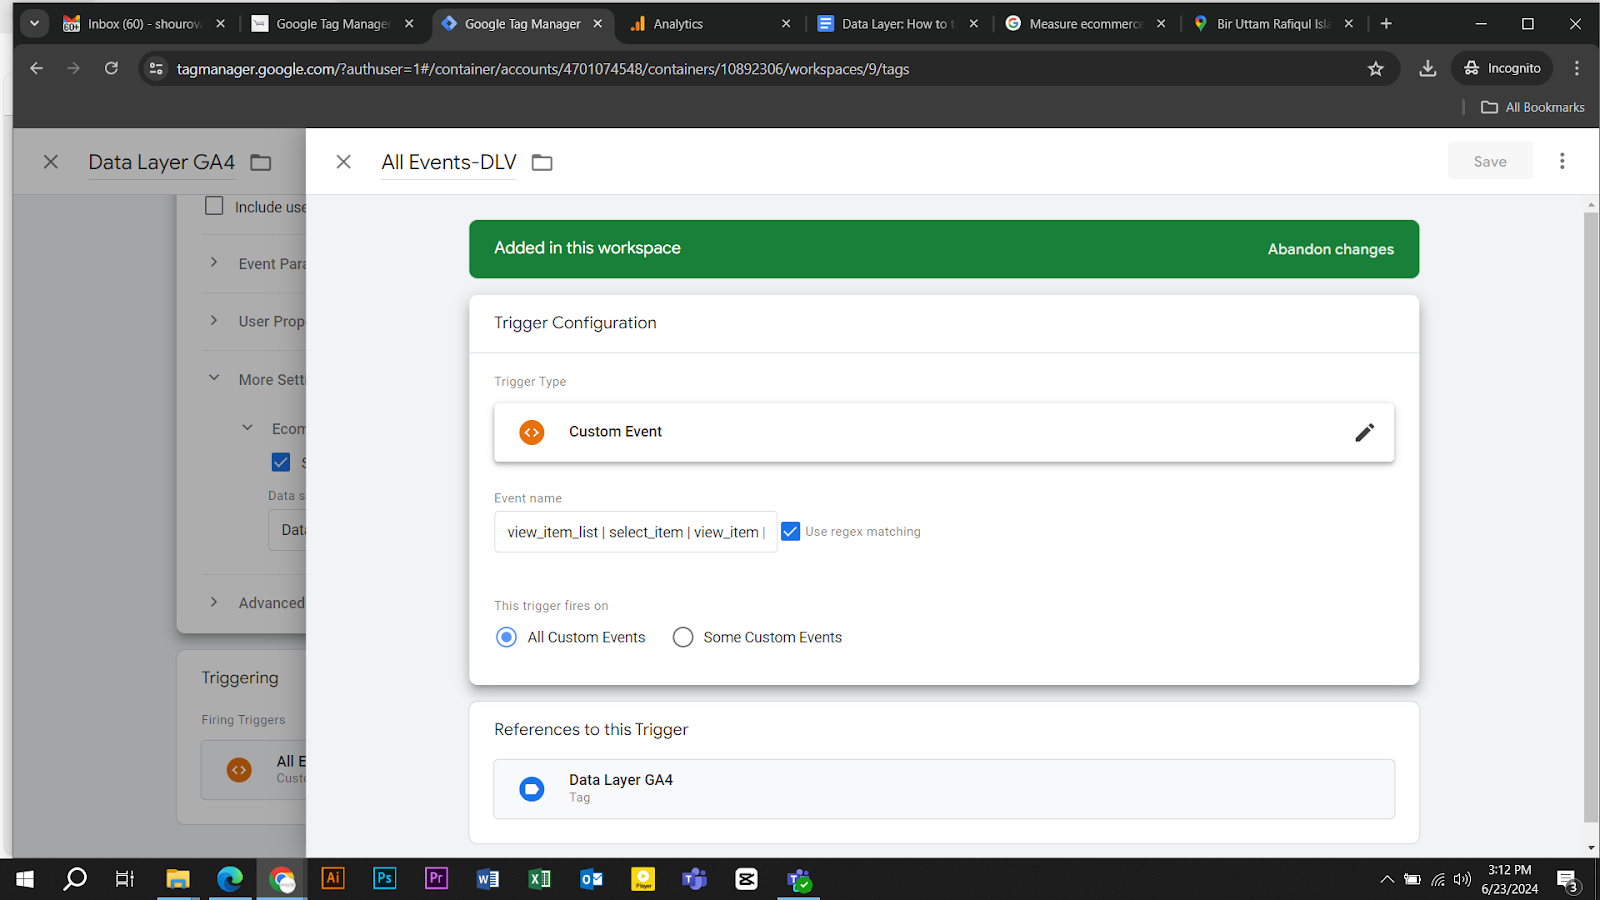
3d. Now you have to set up a trigger, select the trigger type as custom event

3e. Now put the custom event names that we just created earlier in the event name section
Must select the regex matching check box.
Step 4: Check with Preview mode
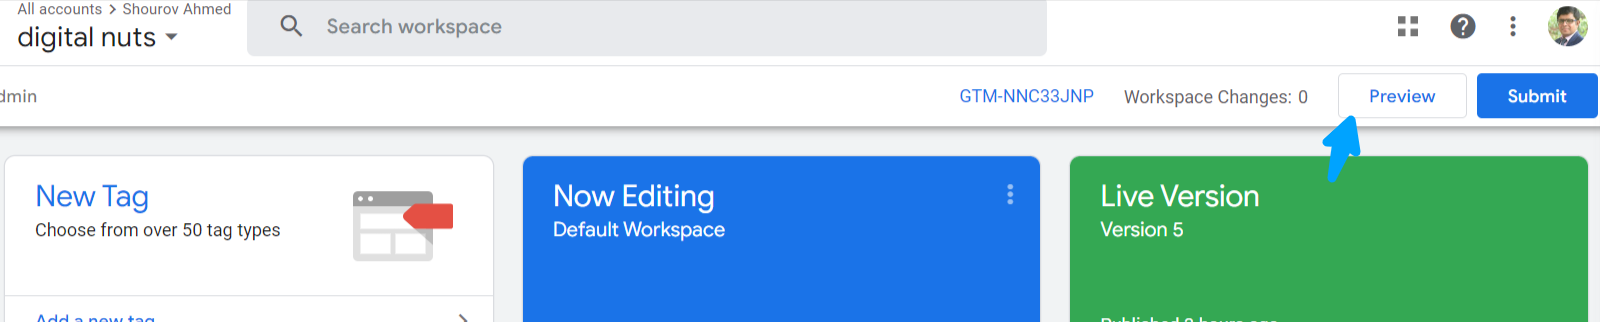
4a. After you have set up the tag and triggers now you need to check whether data layers are implementing properly or not, go to preview and put your website url ( you must install tag assistant chrome extension )
4b. Go to your e-commerce website category page, select any of the items and hover back to the tag assistant tab we will find your tags has been fired and view items data layer has been activated successfully.
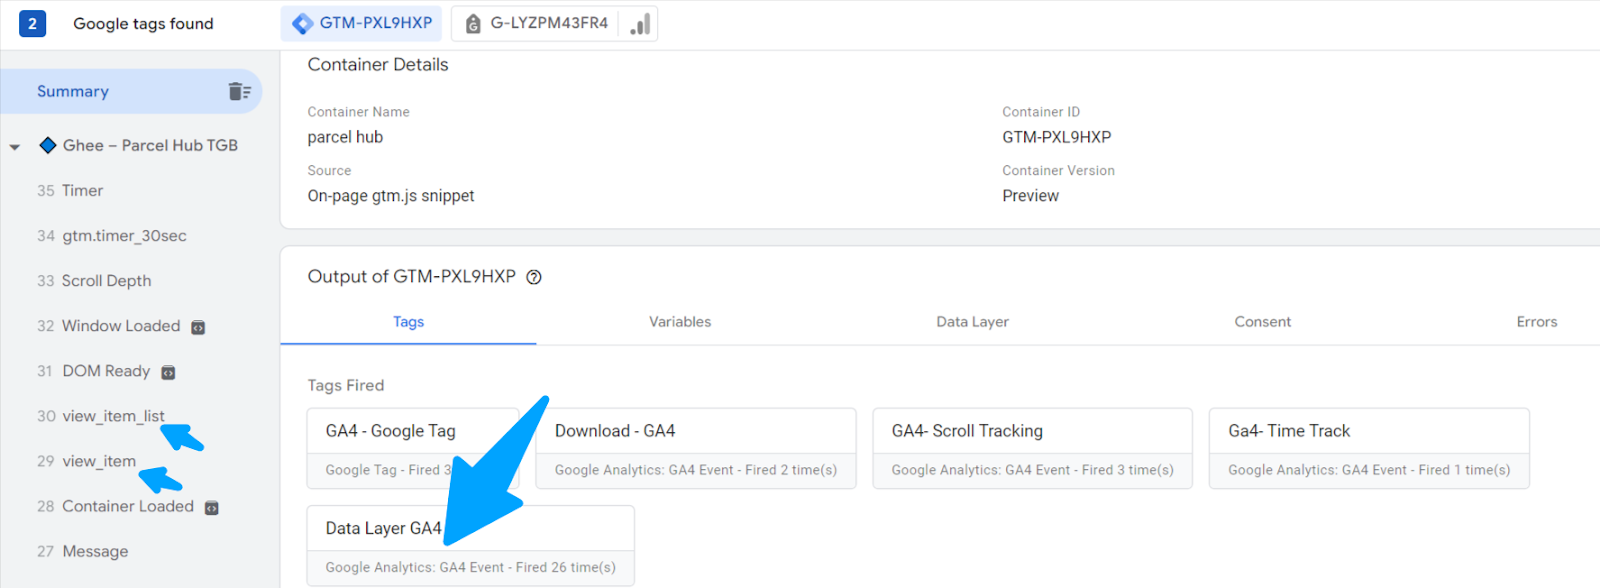
Like this you can track view cart, add to cart, checkout and purchase data via data layer in gtm
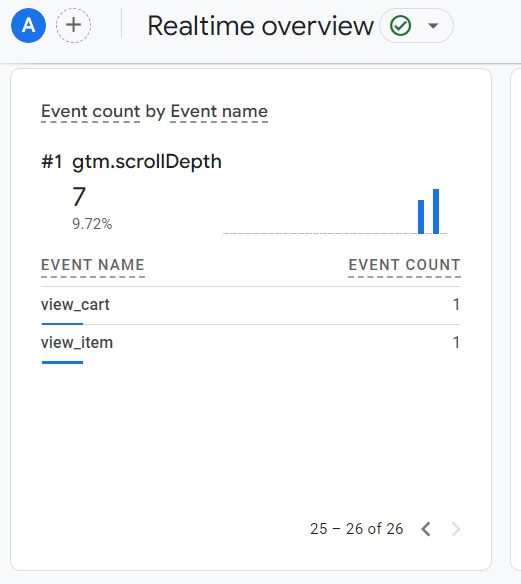
4e. Check the data in ga4
Congratulations! You have successfully implemented a data layer in your google tag manager for your e-commerce website. Please note that we have implemented the trigger for all the events as a whole with a matching regex formula. If you want to set up the trigger for an individual event you can set up those in gtm. But as we are tracking in 2024 we should track them as a whole.
Benefits of Implementing a Data Layer
Enhanced Tracking and Analytics
A well-implemented data layer enhances the precision of tracking and analytics. It allows for detailed insights into user behavior, which can be invaluable for making data-driven decisions.
Improved User Experience
With accurate data, you can optimize your website’s user experience by understanding how users interact with your site. This insight can lead to better design decisions and more effective content strategies.
Challenges and Considerations
Performance Impact
Implementing a data layer can impact site performance, especially if the data collection process is not optimized. It’s important to ensure that your data layer code does not slow down your site.
Compatibility Issues
Sometimes, conflicts between different plugins or themes can arise, leading to issues with your data layer. Regular updates and compatibility checks can help mitigate these problems.
Conclusion
Implementing a data layer in WordPress for tracking e-commerce data is a powerful strategy to gain valuable insights and optimize your online store. By setting up a data layer with Google Tag Manager or a similar tool, you can ensure accurate data collection, improve your marketing efforts, and ultimately drive better business outcomes. Take the time to configure and test your data layer properly, and you’ll be well on your way to mastering e-commerce analytics.
FAQs
What is the purpose of a data layer?
A data layer acts as an intermediary that captures and stores information about user interactions on a website. It helps in organizing and sending this data to analytics and tracking tools for better insights and reporting.
How do I know if my data layer is working?
You can use tools like Google Tag Manager’s preview mode or browser developer tools to check if the data layer is correctly capturing and sending data. Ensure that the data matches your expectations and is being transmitted properly.
Can I use multiple data layers in WordPress?
While it’s technically possible to use multiple data layers, it’s usually not necessary and can complicate the setup. It’s more effective to use a single, well-configured data layer for most sites.
Are there any free data layer plugins?
Yes, there are several free data layer plugins available, such as Google Tag Manager for WordPress. These plugins can help you set up and manage your data layer without additional costs.
How does a data layer affect site speed?
A data layer can impact site speed if not implemented efficiently. It’s important to optimize the data layer code and regularly test its performance to ensure it doesn’t slow down your site.